Create a Choose Your Own Adventure Story with Google Forms
Does anyone remember the old chapter books in the Choose Your Own Adventure series? Readers would get to a certain point in the story and then have to choose the ending they preferred (does the princess marry the prince, does the hero find the treasure).
Well, now you can create stories like this for your classroom. Students will have lots of fun navigating through the adventure and choosing their own ending. Teachers can also use it for other free choice assignments. For example, students studying colonial America can choose the path of a settler, Native American, servant, explorer, etc. Another theme could be discussing consequences for various behavioral choices, such as “What would you do if the substitute teacher got locked out of the room?” For younger students, you can create “Yes” and “No” questions with pictures, such as “What do plants need to survive”?
Using Google Forms to Choose Your Adventure
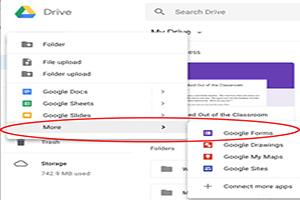
First thing you have to do is open Google Forms within your G Suite for Education family of apps (you may have used this already for surveys or quizzes). Under the apps, you might have to click “More” to reveal Forms.
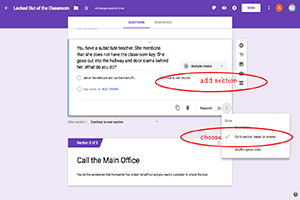
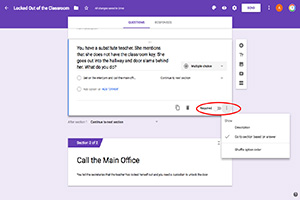
Create a new blank form. Each Google Form question has the option of the answer being multiple choice (one answer), checkboxes (such as choose all that apply), text (writing in an answer), choose from a drop-down list, etc. For Choose Your Own Adventure, you only need Multiple Choice. In the first question field, write a brief scenario: “You have a substitute teacher. She mentions that she has the classroom door propped open because she doesn’t have the key. She goes out in the hallway, and the door slams behind her. What do you do?”
Click “Add a section.” Rename this section “Page 2.”
Again click “Add a section.” Rename this section “Page 3.”
For answers, under “Option 1” write: Get on the intercom and phone the main office
Click “Add Option” and for Option 2 write: Run the class yourselves

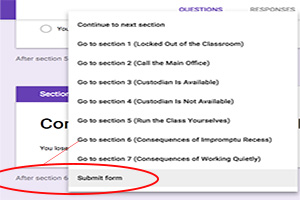
Click on the three dots (signifying More) and select: Go to section based on answer. Pull down to the desired section.
Each answer should direct the students to a different section. Choose the section for each answer (Option (or answer) 1 goes to Page 2; Option 2 goes to Page 3, etc). If you name the sections instead of leaving them as Page 2, Page 3, it will make them easier to identify.
Make all questions “Required” to answer.
You want the last answer to go to “Submit Form.” That is the end of the form. So, when you have two alternative endings, the very last one will automatically go to Submit Form. Make sure you change the next-to-last answer to Submit Form (don’t leave it as Next Section, or it will go to the final answer).
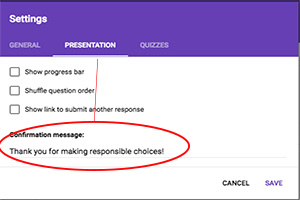
When all questions have been directed to the desired section, you can end the adventure. You might want to put a final message, like “Thanks for playing” or in our example, “Thanks for making responsible choices!” Go to Settings & Presentation and type your confirmation message.
Under Settings, you can also restrict who answers the quiz and whether they are limited to one response each. Click on the “eye” icon to preview the quiz. To share the form, click Send and get the link.
If you create an original form and share it, you will want to change the last word from “Edit” to “Copy”, so no one edits your original form. You do not have to do this if you are just sharing a form with your class. Have fun choosing your own adventure!
Sign up for email and blog updates and receive this free activity as a thank you!